

- 14 October, 2026
- 24
- 0
A suede sole that has gone smooth and shiny can change the way a dance feels underfoot. Instead of controlled glide, you may feel yourself sticking on turns, losing ease through a cha-cha lock step, or working harder during a ballroom heel turn. Learning how to clean suede soles is a small part of shoe care, but it helps preserve the balance of grip and movement that proper dance shoes are designed to provide.
For ballroom, Latin, salsa, and social dance shoes, cleaning the sole does not mean making it look polished. The goal is to lift packed-down fibers, remove surface debris, and restore a lightly textured nap. A little regular care also helps you notice when a sole is worn beyond what brushing can fix.
Why suede dance soles need regular care
Suede soles are made for indoor dance floors. Their texture gives dancers enough traction to push off, while still allowing the foot to pivot and travel. Over time, dust, floor wax residue, lint, and oils from the floor press the fibers flat. The sole can become hard, slick, or visibly shiny in high-contact areas such as the ball of the foot and heel.
A sole that grips too much is not always safer. Excess friction can place more strain on knees and ankles, particularly during turns. On the other hand, a sole that is overly worn or contaminated may slide unpredictably. The right feel depends on your dance style, floor surface, and technique, but a clean, raised suede nap gives you the most consistent starting point.
What you need to clean suede soles
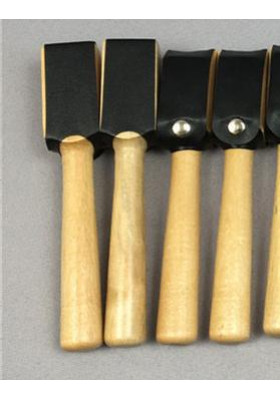
The best tool is a dedicated dance shoe brush with short metal bristles. It is made to raise the nap without soaking or coating the sole. Keep the brush in your dance bag so you can use it when the sole begins to feel flat, not only when it becomes severely compacted.
For basic care, have these items on hand:
- A dance shoe suede brush with metal bristles
- A dry cloth or soft towel
- A stiff, dry nylon brush for loose surface dirt
- A small clean area where you can brush without spreading debris
Avoid household cleaning sprays, leather conditioners, saddle soap, oils, and water. These products may be useful for other materials, but they can stiffen, stain, or permanently alter a suede dance sole. A suede sole should stay dry.
How to clean suede soles step by step
Start with completely dry shoes
If you have just finished a class or competition, let the shoes air out first. Moisture from perspiration does not necessarily damage the sole, but brushing wet suede can compress the fibers or create an uneven surface. Remove the shoes from your dance bag and allow them to dry naturally away from direct heat.
Do not place dance shoes on a radiator, use a hair dryer, or leave them in strong sun. High heat can dry out the uppers, affect adhesives, and make delicate materials less flexible.
Brush from heel to toe in short strokes
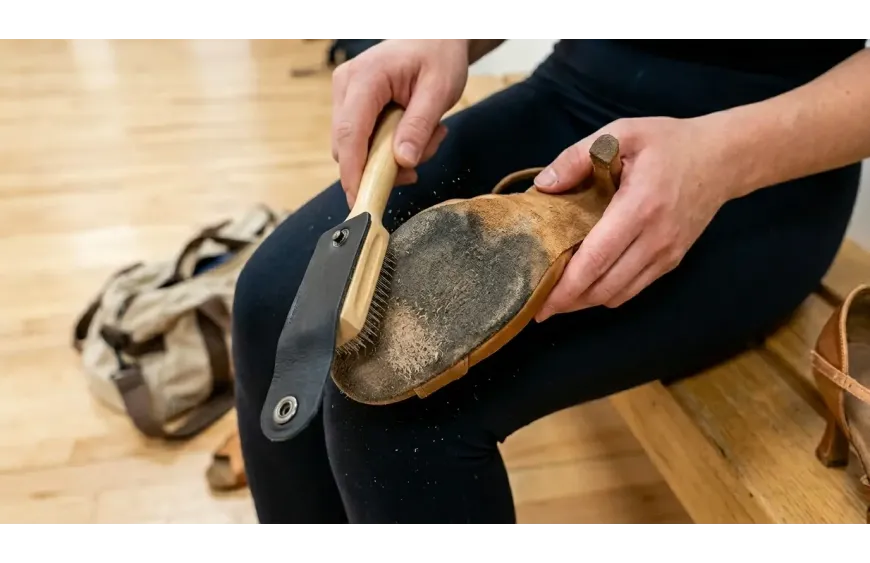
Hold one shoe firmly with the sole facing up. Use the metal-bristle suede brush in short, purposeful strokes from heel toward toe. You are not trying to scrub through the sole. Apply moderate pressure, enough to lift the flattened nap and loosen compacted dust.
Work across the whole sole, giving extra attention to the areas where you pivot and push off. For many dancers, that means the ball of the foot, the inside edge of the forefoot, and the outer edge of the heel. Turn the shoe as needed so the brush reaches the narrow arch area as well.
You may see fine dust come away from the sole. That is normal. Brush over a towel, garbage bin, or outdoor mat to keep the mess contained.
Check the texture, not just the appearance
After brushing, run a fingertip lightly across the suede. It should feel soft and slightly raised rather than glassy or slick. The sole may still look marked or darker in places, especially on shoes that have seen many hours of use. Appearance is less important than an even texture and predictable movement on the floor.
If a section remains smooth, brush that area again using a few crossed strokes. Do not keep attacking one spot for several minutes. Over-brushing can thin the suede over time. Two or three light passes are better than one aggressive session.
Remove loose debris before wearing
Tap the soles together gently or wipe around the edges with a dry cloth to remove loose dust. Check that no fibers, grit, or bristle fragments are caught near the sole edge. Then store the shoes in a breathable shoe bag or separate compartment of your dance bag.
Avoid walking outdoors after brushing. Pavement, parking lots, wet sidewalks, and rough concrete can quickly undo the care you have just given the sole. If you need to travel from the car to the studio, wear street shoes and change once inside.
How often should you brush dance shoe soles?
Frequency depends on how often you dance and what the floor is like. A dancer attending one weekly social class may only need a light brush every few wears. Someone practicing several times a week, teaching, rehearsing for a showcase, or competing may brush the soles before each session or event.
Let the shoe tell you what it needs. Brush when turns feel unusually sticky, when you can see a shiny compressed patch, or when the sole has picked up visible dust. It is better to do a quick, gentle refresh regularly than wait until the sole becomes heavily packed down.
Floor conditions matter too. A dusty studio floor may call for more frequent brushing. A very smooth ballroom floor may make a freshly brushed sole feel more grippy than you prefer at first. If you are dancing on an unfamiliar floor, test your movement with a few controlled walks, pivots, and turns before dancing full-out.
What to do about sticky spots and stains
Most sole issues improve with dry brushing. If you step in something sticky, act carefully. First, allow the material to dry if it is damp. Then use the suede brush to lift the residue with short strokes. A dry nylon brush can help loosen surface particles before you use the metal-bristle brush.
Do not wash the sole under a tap or apply stain remover. Water can harden suede, and cleaning chemicals can leave behind residue that changes traction. If the contamination will not lift, or the sole feels gummy after repeated dry brushing, it may be time to have the shoe assessed rather than experimenting with products at home.
When brushing is not enough
A shoe brush refreshes the suede nap, but it cannot replace missing material. If the sole has worn thin, developed a hole, started peeling away from the shoe, or has become uneven enough to affect your balance, stop relying on brushing as a solution. Worn heels, loose heel caps, and damaged straps can also affect safe movement even when the suede itself looks acceptable.
This is especially relevant for dancers who practice in the same pair they wear for performances or competitions. Keeping a dedicated practice pair can extend the life of a special event shoe, while also giving you a backup if one pair needs repair or replacement. The best choice depends on how frequently you dance, your floor conditions, and whether you need a different heel height or support level for training.
Protect your soles between dances
Good cleaning starts with good habits. Wear your dance shoes only indoors, carry them in a bag, and put them on after you arrive at the venue. Keep them away from food, drink, wet entryways, and gritty surfaces. If you attend classes in winter or rainy weather, this is particularly worthwhile: even a short walk through a damp parking area can transfer dirt and moisture directly to the suede.
For dancers choosing a first pair of ballroom or Latin shoes, suede soles are often the preferred option for studio and ballroom use, but they do require this small routine. At Dancewear Champions, proper shoe guidance includes considering your dance style, intended floor, fit, and the practical care needed to keep your shoes performing well.
A few minutes with a suede brush before class can make your next turn feel more natural, more controlled, and much closer to the movement your dance shoes were made to support.